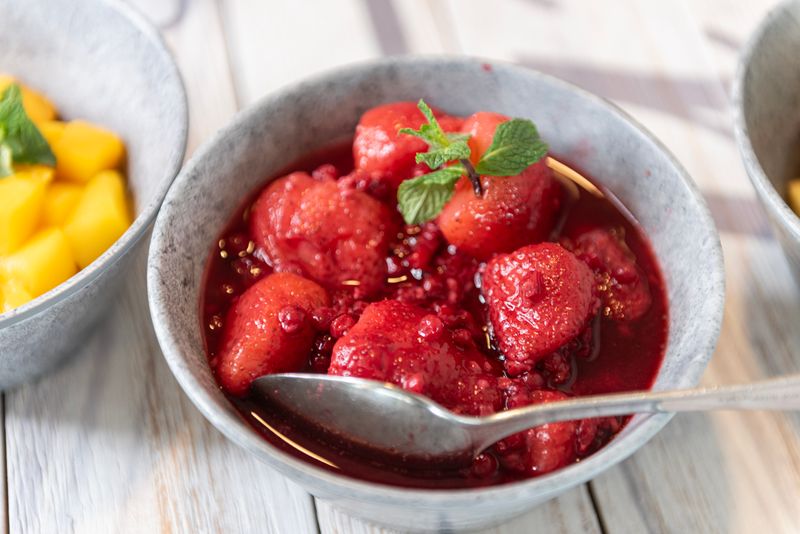
A fruit syrup is one of the most efficient ways to capture a fruit's flavor in a form that pours, mixes into drinks, and keeps far longer than the fresh fruit itself. Unlike a compote or jam, which keeps the fruit's texture intact, a syrup strips the solids away and leaves behind a clear, concentrated liquid built for drizzling over pancakes, stirring into sodas and cocktails, or swirling through yogurt. The method is simple once you understand the basic logic — cook fruit with sugar and water, extract the liquid, discard or repurpose the solids — but a few technique choices make the difference between a syrup that tastes vivid and one that tastes like watered-down jam.
The Basic Method, Step by Step
Most fruit syrups start the same way: combine chopped or crushed fruit with sugar and a modest amount of water, then simmer gently until the fruit breaks down and releases its juice. The exact cook time depends on the fruit — soft berries release juice in minutes, while firmer stone fruit needs longer simmering to soften. Once the fruit has given up its liquid, the mixture is strained through a fine sieve or cheesecloth, pressing gently to extract as much flavorful liquid as possible without forcing through pulp that would cloud the final syrup.
Choosing Fruit: What Works Best
Berries — strawberries, raspberries, blackberries, blueberries — are the easiest entry point because they release juice quickly and need very little added water. Stone fruits like peaches, plums, and cherries work well too but benefit from being pitted and roughly chopped first to speed up juice release. Citrus is a special case, since it usually needs its peel involved for full flavor rather than just the juice. Low-water fruits like apples or pears make a thinner-flavored syrup unless you concentrate their juice significantly, so they're less commonly used for this technique on their own.
Sugar's Two Jobs: Flavor and Preservation
Sugar isn't just there to sweeten; it also draws liquid out of the fruit through osmosis, which is part of why sugar is often added before any heat is applied, giving the fruit time to start releasing juice on contact. The amount of sugar also determines shelf life — a syrup with a higher sugar-to-liquid ratio resists mold and fermentation longer than a lightly sweetened one, following the same principle that makes concentrated simple syrup last longer than a diluted version.
Straining: The Step That Determines Clarity
A syrup strained only through a coarse sieve will carry some pulp and look cloudy; one pressed through a fine-mesh strainer or cheesecloth, especially if you let it drip rather than forcing it, comes out closer to clear and jewel-toned. For the clearest possible result, let the mixture strain undisturbed for an hour or more before giving it a gentle press at the end, rather than squeezing hard from the start, which pushes fine pulp through the mesh along with the liquid.
Reducing for a Thicker Syrup
After straining, many cooks return the liquid to the stove for a second, shorter simmer to reduce it further and concentrate both flavor and body. This step is optional — some fruit syrups are meant to stay thin for mixing into drinks — but it's the difference between a syrup that tastes like diluted fruit juice and one that tastes like the fruit itself, just liquid. Watch the reduction closely near the end, since a syrup that's perfect warm can turn noticeably thicker once it cools.
What to Do With the Leftover Solids
The strained fruit pulp left behind still carries real flavor and shouldn't be thrown out by default. It works well stirred into oatmeal, baked into a quick-bread batter, or simmered a little further with extra sugar into a rough fruit butter. Treating the syrup method as a way to get two usable products from one batch of fruit — a clear syrup and a flavorful pulp — makes the process more efficient than other fruit-preserving techniques that only yield one.
| Fruit type | Prep needed | Typical simmer time | Straining difficulty |
|---|---|---|---|
| Berries | Minimal, rinse only | 5–10 minutes | Easy |
| Stone fruit | Pit and chop | 10–15 minutes | Moderate |
| Citrus | Zest/peel plus juice | 15–20 minutes | Moderate |
| Apples/pears | Peel and chop | 20+ minutes | Harder, needs more reduction |
Common mistakes
- Adding too much water up front, which dilutes the fruit flavor before the syrup even starts cooking.
- Forcing the strain by pressing hard right away, which pushes cloudy pulp through the mesh along with the liquid.
- Skipping the reduction step when a thicker syrup was actually wanted, leaving the result thinner than intended.
- Using underripe fruit, which carries less natural sugar and flavor and produces a thinner, more one-dimensional syrup.
- Storing the finished syrup unrefrigerated for long stretches, even though it looks shelf-stable like a commercial syrup.
Frequently asked questions
- Can I use frozen fruit instead of fresh?
- Yes, and frozen fruit often releases juice even faster than fresh since the freezing process ruptures some of the cell walls; just account for the extra water it releases as it thaws.
- How long does homemade fruit syrup keep?
- Refrigerated in a clean, sealed container, most fruit syrups keep for two to three weeks; the exact window depends on sugar concentration and how carefully it was strained and bottled.
- Why is my fruit syrup cloudy instead of clear?
- Cloudiness almost always comes from fine pulp passing through the strainer; a finer mesh, cheesecloth, or a longer undisturbed drip time will produce a clearer result.
- Can I reduce the sugar in a fruit syrup recipe?
- You can, but expect a shorter shelf life and a thinner body, since sugar concentration does real preservation and texture work beyond just adding sweetness.
Sources: published culinary technique references on fruit syrup and cordial-making methods; general food science references on osmosis, sugar concentration, and water activity in fruit preservation.